Filtering images#
Image filters take an image and produce a new image. Typically, a filter kernel goes from pixel to pixel and computes a new pixel value depending on an old pixel and its neighborhood.
See also
We start with a test image and apply a Gaussian blur filter.
import numpy as np
from pyclesperanto_prototype import imshow
from skimage.filters import gaussian
from skimage import filters
import matplotlib.pyplot as plt
from skimage.morphology import disk
from skimage.io import imread
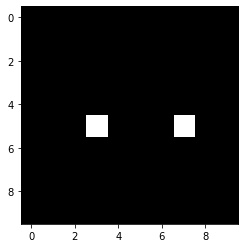
test_image = np.zeros((10,10))
test_image[5,3] = 1
test_image[5,7] = 1
test_image
array([[0., 0., 0., 0., 0., 0., 0., 0., 0., 0.],
[0., 0., 0., 0., 0., 0., 0., 0., 0., 0.],
[0., 0., 0., 0., 0., 0., 0., 0., 0., 0.],
[0., 0., 0., 0., 0., 0., 0., 0., 0., 0.],
[0., 0., 0., 0., 0., 0., 0., 0., 0., 0.],
[0., 0., 0., 1., 0., 0., 0., 1., 0., 0.],
[0., 0., 0., 0., 0., 0., 0., 0., 0., 0.],
[0., 0., 0., 0., 0., 0., 0., 0., 0., 0.],
[0., 0., 0., 0., 0., 0., 0., 0., 0., 0.],
[0., 0., 0., 0., 0., 0., 0., 0., 0., 0.]])
imshow(test_image)

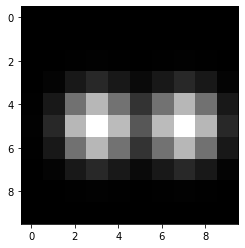
The Gaussian filter takes two important arguments, the image to blur and a sigma parameter. The sigma determines how wide the Gaussian blur should show effects.
blurred = gaussian(test_image, sigma=1)
imshow(blurred)

Let’s compare Gaussian blurred images with different sigma
blurred05 = gaussian(test_image, sigma=0.5)
blurred1 = gaussian(test_image, sigma=1)
blurred2 = gaussian(test_image, sigma=2)
blurred3 = gaussian(test_image, sigma=3)
fig, axs = plt.subplots(1, 4, figsize=(15,15))
imshow(blurred05, plot=axs[0])
imshow(blurred1, plot=axs[1])
imshow(blurred2, plot=axs[2])
imshow(blurred3, plot=axs[3])

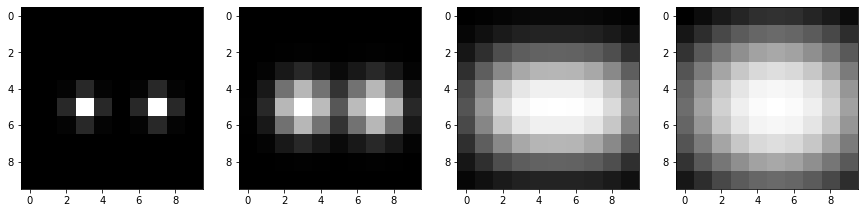
Note: If the sigma is larger than the distance between two spots, the spots cannot be differentiated as two local maxima in the blurred image anymore.
Filters with structuring elements#
Some filters ask for a structuring element as parameter. In biological/microscopy applications, the disk sturcturing element is most commonly used. To understand it, we should visualize it first. A disk with radius 4 is a 9x9 large image containing black pixels(intensity=0) and disk-shaped pixels with value 1.
imshow(disk(4))

Disks with other radii look like this:
max_radius = 5
fig, axs = plt.subplots(1, max_radius, figsize=(15,15))
for r in range(1, max_radius + 1):
imshow(disk(r), plot=axs[r - 1])
axs[r - 1].set_title("Radius " + str(r))

Coming back to our test image, this is how it looks like when we apply a mean filter with different disk radii.
filtered1 = filters.rank.mean(test_image, disk(1))
filtered2 = filters.rank.mean(test_image, disk(2))
filtered3 = filters.rank.mean(test_image, disk(3))
fig, axs = plt.subplots(1, 4, figsize=(15,15))
imshow(test_image, plot=axs[0])
axs[0].set_title('original')
imshow(filtered1, plot=axs[1])
axs[1].set_title('Mean (radius = 1)')
imshow(filtered2, plot=axs[2])
axs[2].set_title('Mean (radius = 2)')
imshow(filtered3, plot=axs[3])
axs[3].set_title('Mean (radius = 3)')
C:\Users\rober\AppData\Local\Temp\ipykernel_8564\198849488.py:1: UserWarning: Possible precision loss converting image of type float64 to uint8 as required by rank filters. Convert manually using skimage.util.img_as_ubyte to silence this warning.
filtered1 = filters.rank.mean(test_image, disk(1))
C:\Users\rober\AppData\Local\Temp\ipykernel_8564\198849488.py:2: UserWarning: Possible precision loss converting image of type float64 to uint8 as required by rank filters. Convert manually using skimage.util.img_as_ubyte to silence this warning.
filtered2 = filters.rank.mean(test_image, disk(2))
C:\Users\rober\AppData\Local\Temp\ipykernel_8564\198849488.py:3: UserWarning: Possible precision loss converting image of type float64 to uint8 as required by rank filters. Convert manually using skimage.util.img_as_ubyte to silence this warning.
filtered3 = filters.rank.mean(test_image, disk(3))
Text(0.5, 1.0, 'Mean (radius = 3)')
